

Before you can start writing your first plugin, lets cover the most important basics of writing a plugin.
The basic plugin concepts
A RestDB plugin is a client side API that you can call to "hook" your own Javascript functions into various point of the standard data admin application.
You edit your plugins in "Developer Mode" by navigating to the plugin code editor from the database top menu shown in the example below.

The plugin API
The generic format to add a plugin is show in the following code snippet:
// load an external JS library
plugins.loadScript(url, () => {
    // the JS library is loaded
});

// register a plugin hook
plugins.register("[plugin-hook-string]", (parameters...) => {
    // your plugin code here
})
The plugin API has the following available plugin hooks:
| Plugin hooks | Description | Function parameters |
|---|---|---|
| list-view-row-renderer | Change row style | (rowdata, context) |
| list-view-cell-renderer | Change cell style | (celldata, context) |
| detail-view-field-renderer | Access DOM object | (fielddata, context) |
| detail-view-layout | Change layout and add virtual fields | (recorddata, context) |
| record-preview | Change default data previews | (recorddata, context) |
| lookup-select | Override lookup (relation) query, filter, item display | (context) |
| lookup-field | Change a records' lookup/relation display | (context) |
Standard libraries avaliable from a plugin
The RestDB client application uses the following standard libraries, hence you don't need to (and should not) load any of these to use in your plugin code.
- Bootstrap 3.3.6
- JQuery 2.10
- jQuery UI - 1.10.4
- lodash 3.0.1
Loading your plugin
Whenever a client uses the data admin application, all plugin code are loaded into the browser session. The actual plugin is called based on the "hook-string".
For example, when the client is about to render an input field, it checks to see if there are any plugins registered on the detail-view-field-renderer hook. If so, your plugin gets called, and is consequently given control over how a field gets rendered.
Testing and debugging your plugin
Your plugin is dynamically loaded after the RestDB client starts. And since your plugin is not actually a Javascript file, it can be a bit tricky to locate in the browser debugger.
However, by adding a console.log("..."); statement in your plugin code, you can start the debugger by clicking on the output line in the browser Console window.

Clicking on the output line (VM4197:6) starts the debugger right into your plugin code.
An example debugging session screenshot is shown below:

With the basic plugin development workflow covered, lets move on to create an actual plugin that does something useful - a Google Maps plugin for street addresses in our database.
Create a Google Maps developer API key
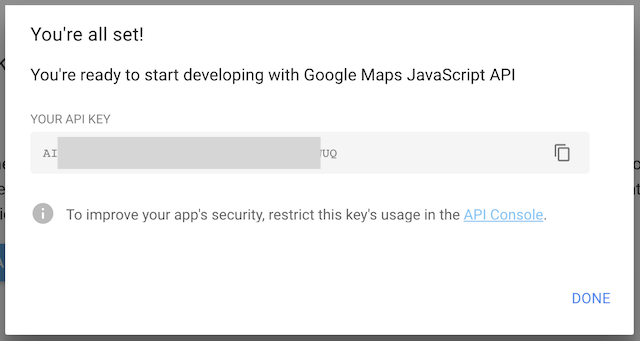
The Google Maps API is a bit strict and you need to register for an API key to use the APIs. Head over to the Google maps developer site and create a new API key for your project. Copy the API key. You'll need to add this to the code later.
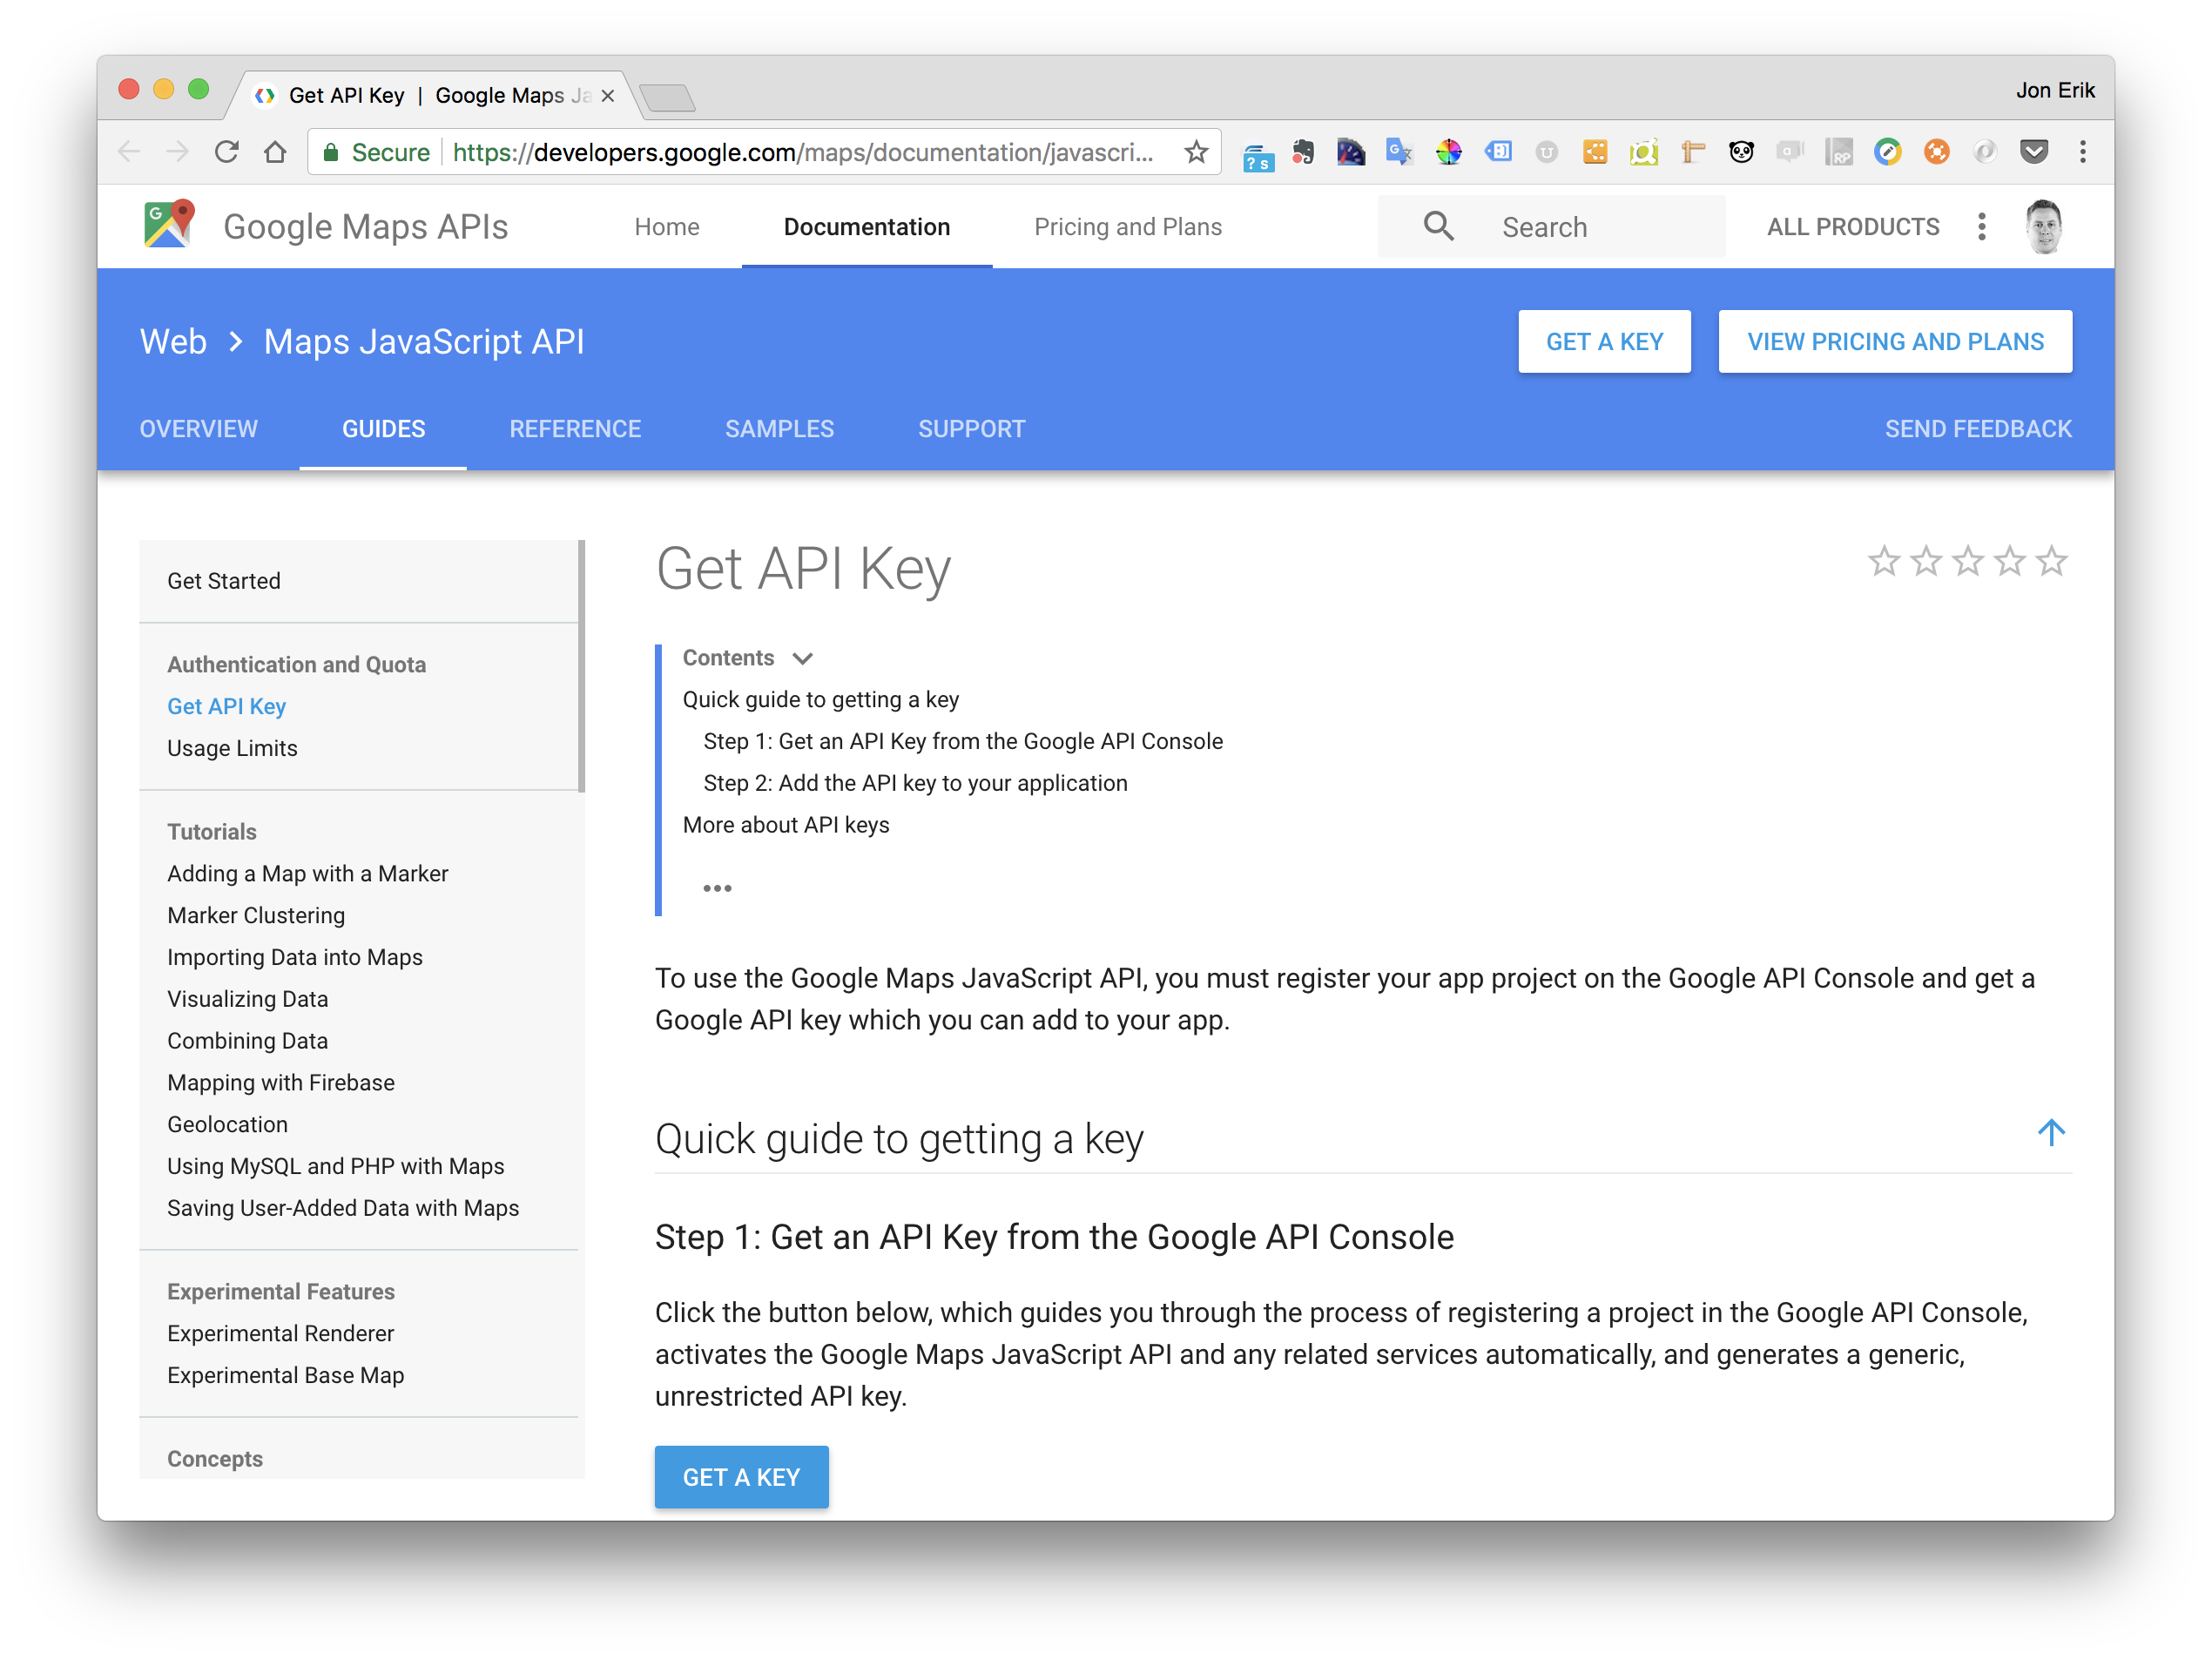
Click on the GET A KEY button and select or create a project, then you should receive a unique API key for your project:
Initialize your plugin
With the new API key from Google Maps copied to your clipboard, we can start by initializing our plugin, first by creating a variable for the APIkey and then loading the Google Maps Javascript library.
const GOOGLE_API_KEY = "YOUR-API-CODE-HERE";

plugins.loadScript(`https://maps.googleapis.com/maps/api/js?key=${GOOGLE_API_KEY}`);
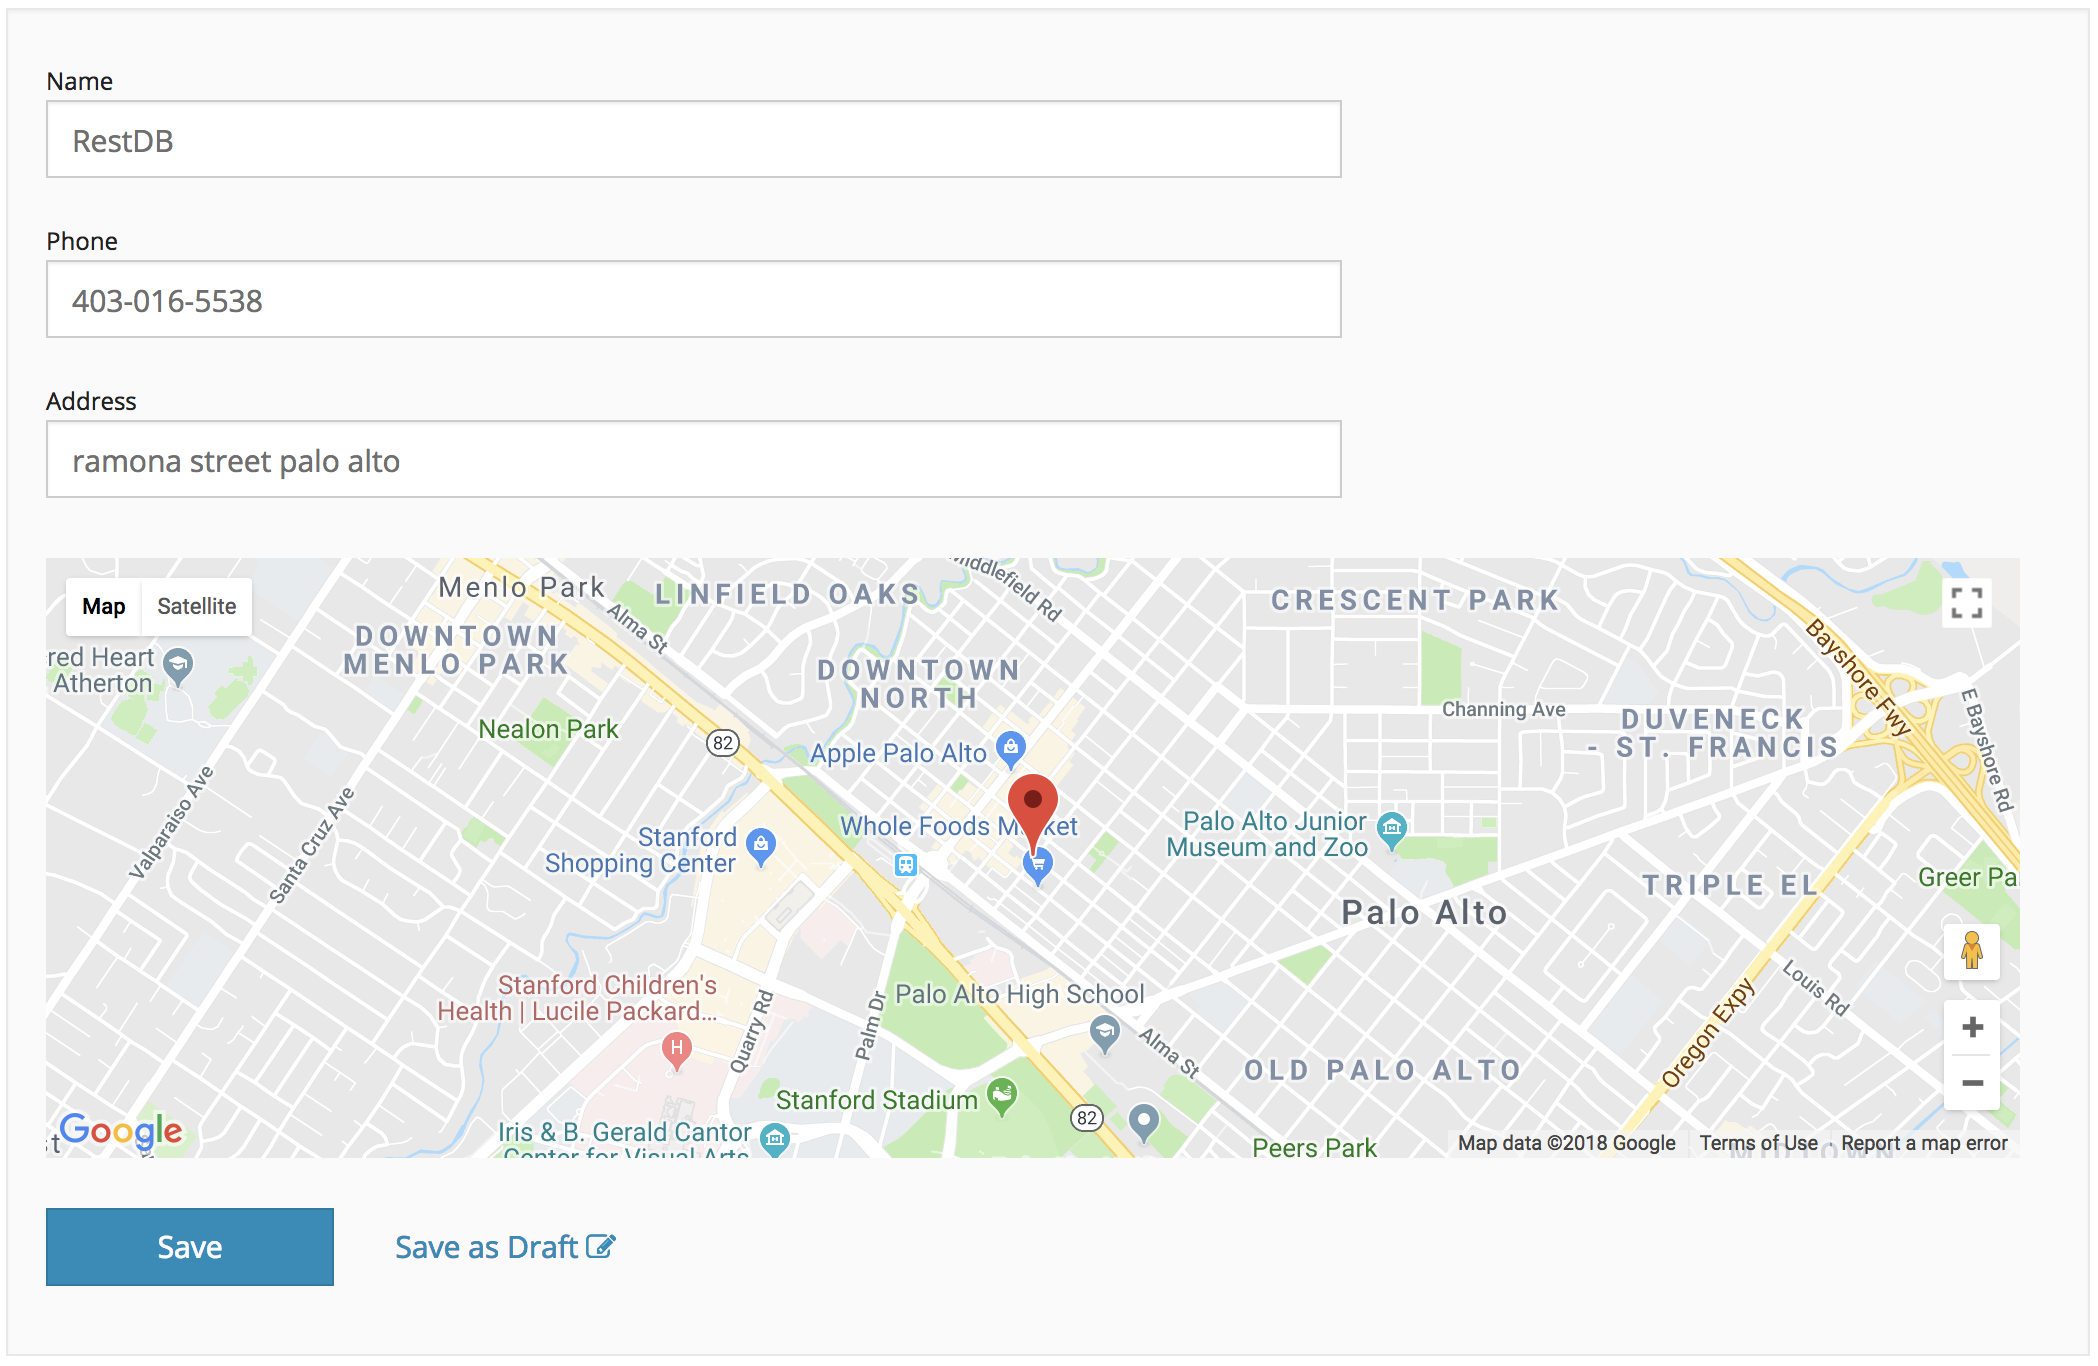
Now we need to register the plugin as a hook for the field renderer. In this example we want the map plugin to execute on the Peoplecollection and on the Address input field. We use the context parameter to get the collection name, and we use the field parameter (JQuery.find) to check if the current field is the Addressfield we want. We then fetch the actual text adress from that field and this will be used to initialize a Google Map for that location.
plugins.register("detail-view-field-renderer", (field, context) => {
    if (context.collection === "people" && field.find("input[name='Address']").length > 0) {
        const address = field.find("input[name='Address']").val();
    }
});
After retrieving the address, we also need to add a content element for the Google Map component.
The code example used JQuery to append an empty div element with an id="map". This will be the element that Google Maps uses to inject the map component.
field.find("input[name='Address']")
        .closest(".form-group")
        .append('<div class="container col-md-12"><div id="map" style="margin-top: 2em; height: 300px">loading map ...</div></div>');
Adding a Google Map with a Marker
To place a marker for an address we need to use
an additional API from Google Maps, the google.maps.Geocoder API.
Geocoding is the process of converting addresses (like "1600 Amphitheatre Parkway, Mountain View, CA") into geographic coordinates (like latitude 37.423021 and longitude -122.083739), which you can use to place markers or position the map.
We create a helper function to initialize Google Maps with a default position, zoom level and DOM element. We wrap the function in a setTimeoutto ensure that the page has been loaded properly
const initMap = (cb) => {
    setTimeout(() => {
        var geocoder = new google.maps.Geocoder();
        var latlng = new google.maps.LatLng(-34.397, 150.644);
        var mapOptions = {
          zoom: 10,
          center: latlng
        }
        var map = new google.maps.Map(document.getElementById('map'), mapOptions);
        cb(map, geocoder);
    }, 1000);
}
When the plugin code executes and render our Address field, we can finally call the helper code and place a marker for the Address value.
initMap((map, geocoder) => {
        geocoder.geocode( { 'address': address}, (results, status) => {
                if (status == 'OK') {
                        map.setCenter(results[0].geometry.location);
                        var marker = new google.maps.Marker({
                                map: map,
                                position: results[0].geometry.location
                        });

                } else {
                        console.log('Geocode was not successful for the following reason: ' + status);
                }
        });
});
That's all there is to it, just a few lines of Javascript code to add Google Maps to any address input field in your admin application.
The complete plugin code is shown below:
/*
* A restdb.io Plugin demo using Google maps.
*/

console.log("My plugin starts");

const GOOGLE_API_KEY = "YOUR-API-CODE-HERE";

plugins.loadScript(`https://maps.googleapis.com/maps/api/js?key=${GOOGLE_API_KEY}`);

const initMap = (cb) => {
    setTimeout(() => {
        var geocoder = new google.maps.Geocoder();
        var latlng = new google.maps.LatLng(-34.397, 150.644);
        var mapOptions = {
          zoom: 10,
          center: latlng
        }
        var map = new google.maps.Map(document.getElementById('map'), mapOptions);
        cb(map, geocoder);
    }, 1000);
}

// register the Plugin in restdb.io

plugins.register("detail-view-field-renderer", (field, context) => {
    if (context.collection === "people" && field.find("input[name='Address']").length > 0) {
        const address = field.find("input[name='Address']").val();
        field.find("input[name='Address']")
        .closest(".form-group")
        .append('<div class="container col-md-12"><div id="map" style="margin-top: 2em; height: 300px">loading map ...</div></div>');
        initMap((map, geocoder) => {
            geocoder.geocode( { 'address': address}, (results, status) => {
                if (status == 'OK') {
                    map.setCenter(results[0].geometry.location);
                    var marker = new google.maps.Marker({
                        map: map,
                        position: results[0].geometry.location
                    });

                } else {
                    console.log('Geocode was not successful for the following reason: ' + status);
                }
            });
        });

    }
})
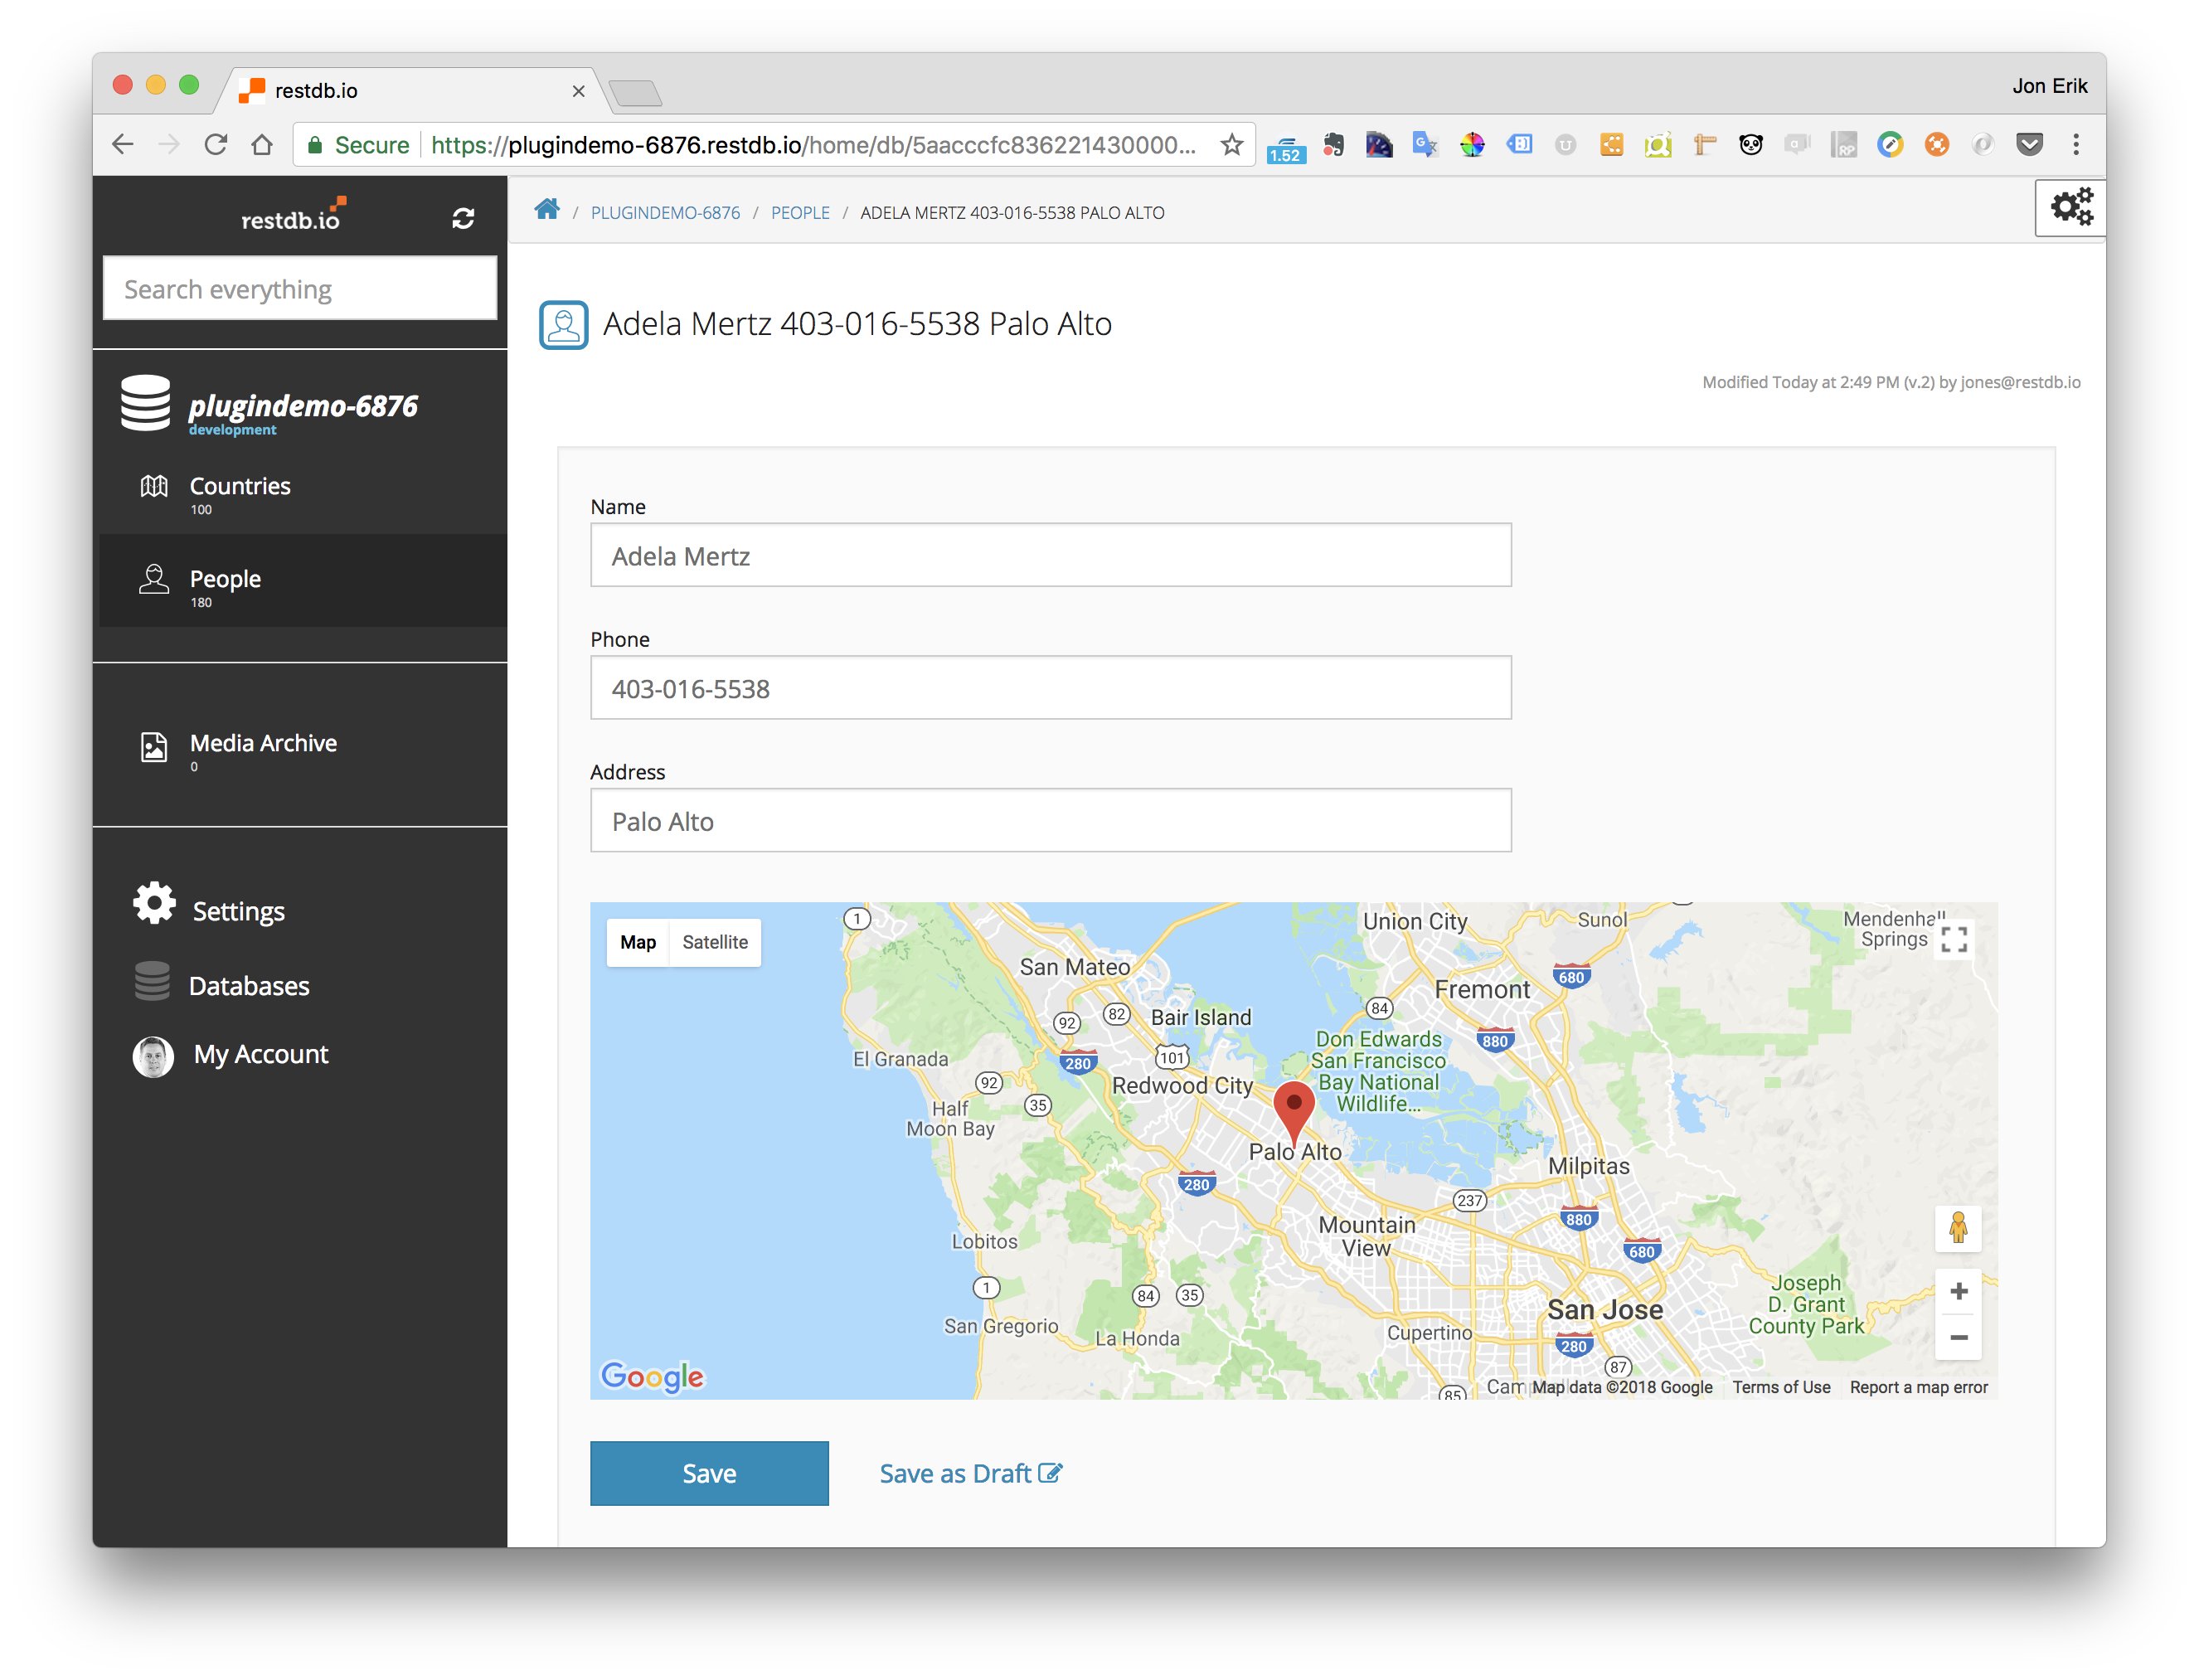
The detail view with our plugin.
Summary
This blog post has shown the powerful concept of RestDB Javascript plugins. It lets you enhance and change the default behaviour and look of the data client.
The Google Maps API contains awesome functions for displaying and interacting with map data. One logical next challenge could perhaps be; to create a search as you type plugin by using the autocomplete API.
Links:
