

 E-mail is an important and integrated part of many systems. restdb.io has had decent support for automating outbound e-mail for a while now (
Enabling the e-mail feature
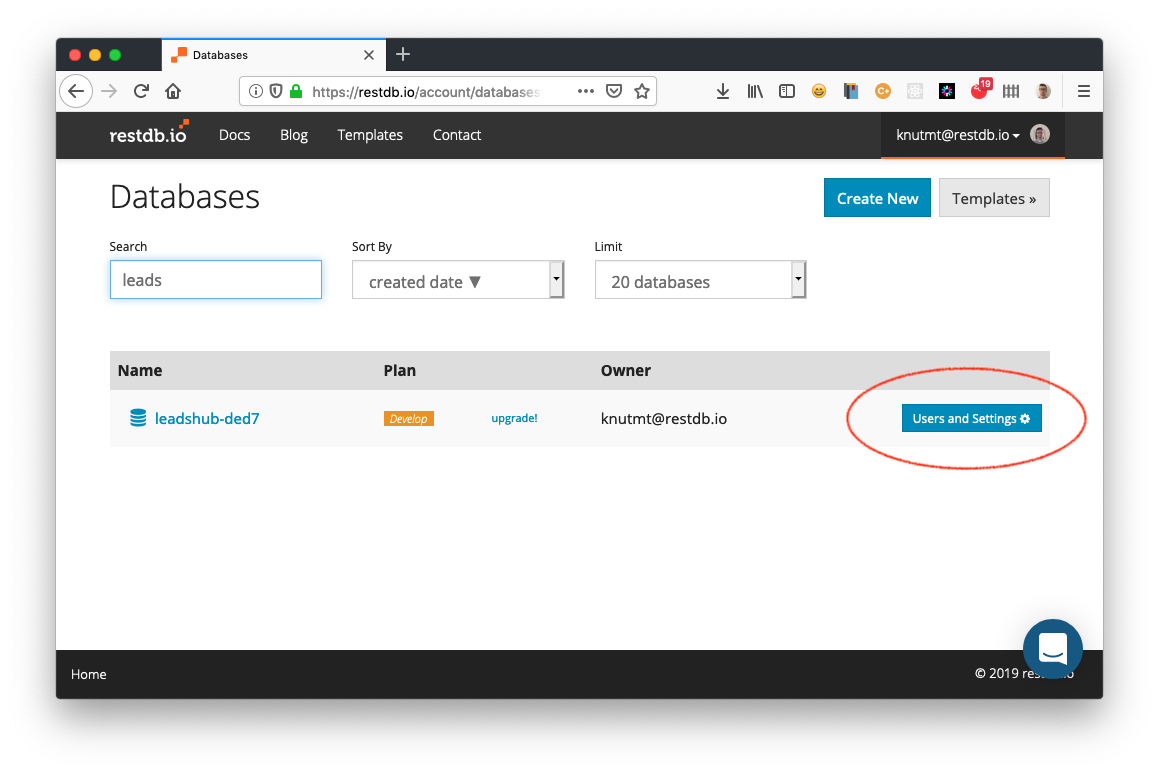
In your list of databases, find the button "Users and Settings" next to the database you want to set up. Click it to open the settings.
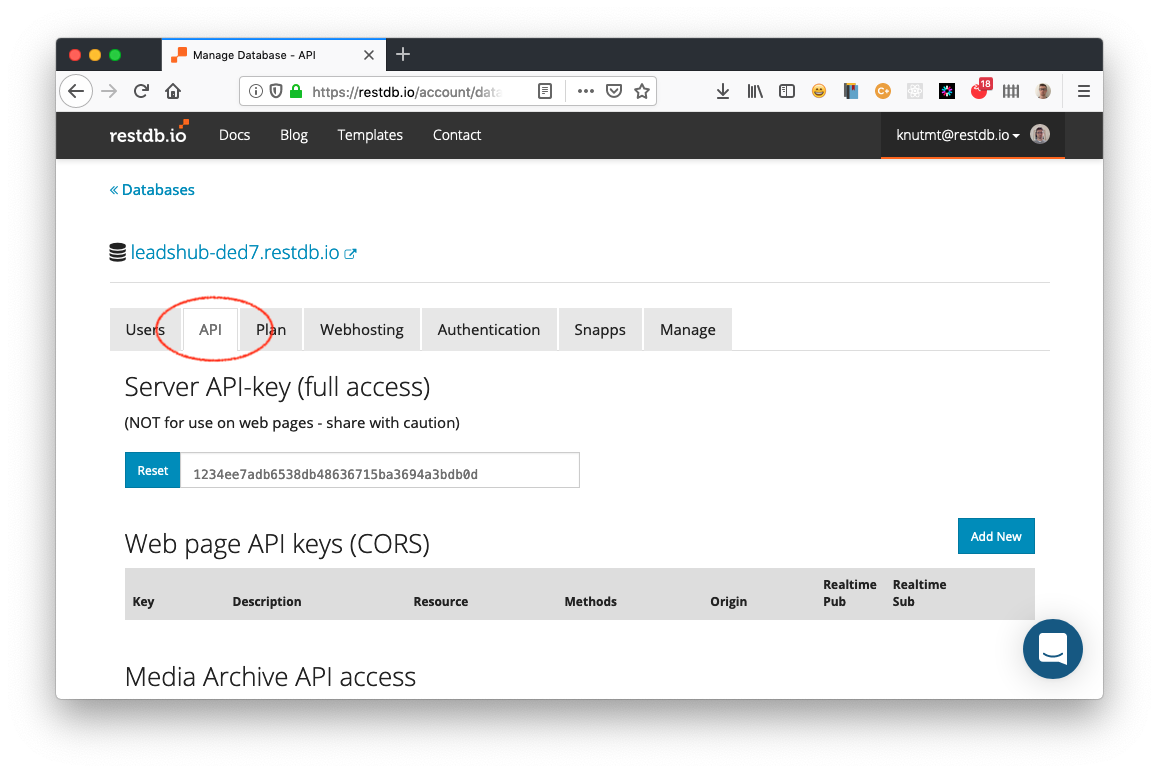
Next, select the "API" tab and scroll all the way down until you see a header with "Incoming email address key".
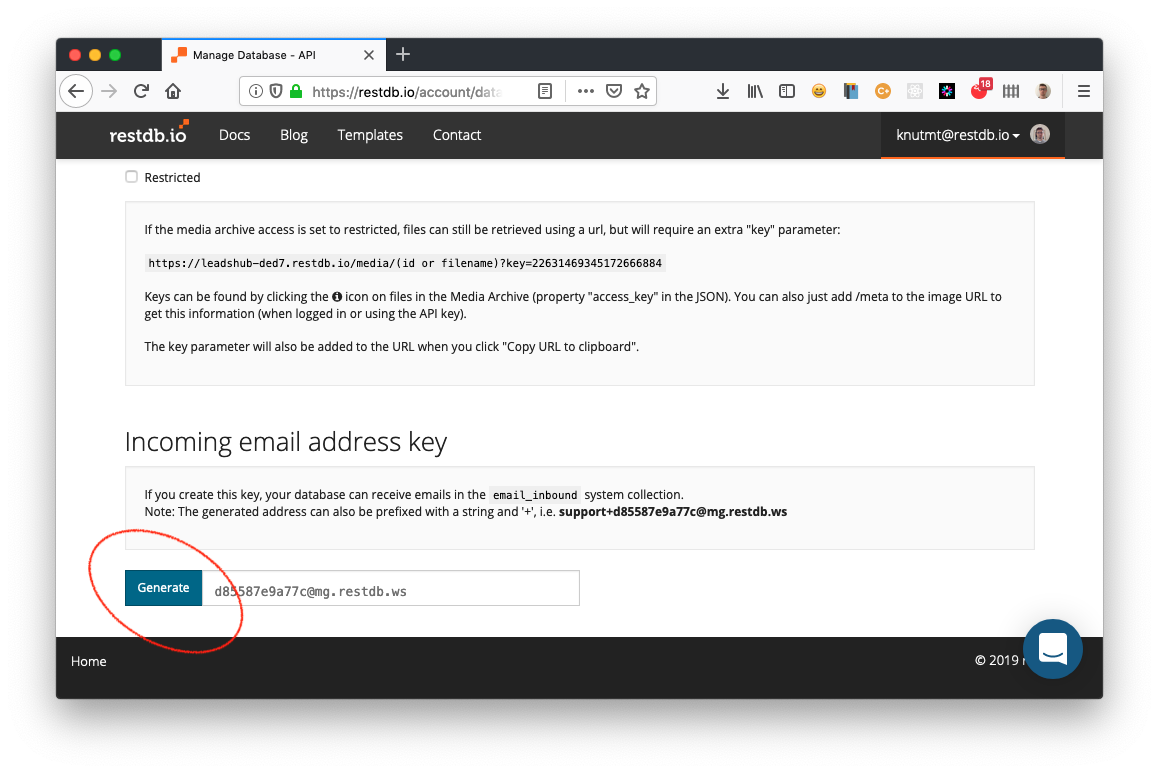
Click the "Generate" button to create an incoming e-mail address for your database. The database can now receive e-mails using this address or this address with a prefix, for example leads+d85587e9a77c@mg.restdb.ws. This prefix can be useful if you want to distinguish between various incoming e-mails and want to process them differently.
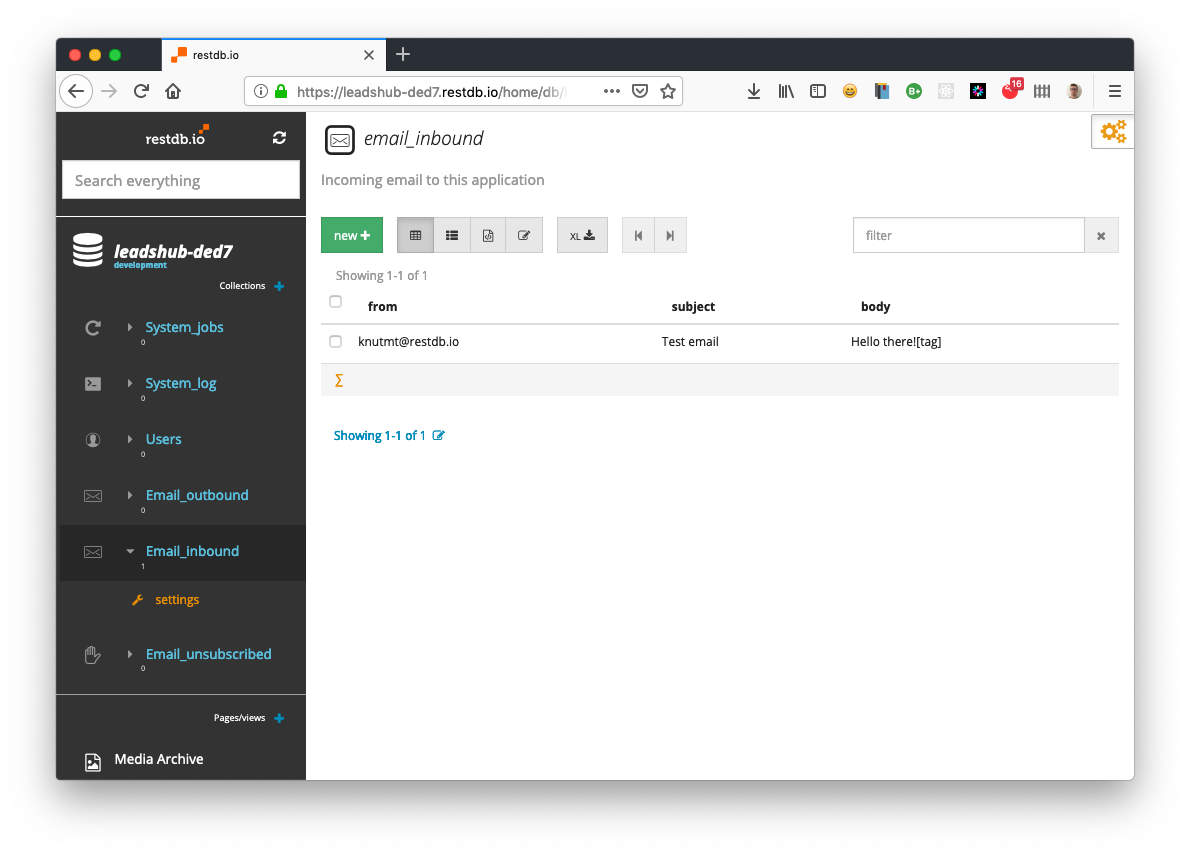
Incoming E-mail collection
Opening the database backend in "Developer" mode, you can select the system collection email_inbound and see any e-mails received. Next up is writing a restdb.io codehook to process the incoming e-mail.
Writing a simple codehook to process the incoming e-mail
We will implement an afterPOST codehook on the email_inbound collection to process our incoming e-mail. This codehook is triggered after an email has been received and in our example, we will insert a new record into a leads collection and then delete the record from the email_inbound collection.
Working with restdb.io codehooks can be difficult if you're not seeing what's going on inside it. There are two ways to find out what's going on. In "Developer Mode", you can either open the REST inspector to do this or open the browsers console and type in:
restdb.startDebug()to start receiving log output from all codehooks.
In order to see what the incoming email feature POSTs to the incoming_email collection, we are going to send an email to our db's address (leads+d85587e9a77c@mg.restdb.ws). When the email is received, the afterPOST codehook is invoked.
Adding the following codehook to incoming_email will let us see what we receive from the incoming email functionality in restdb.io:
async function afterPOST(req, res){
    // log to console to see structure
    console.log("POST body received:");
    console.log(JSON.stringify(req.body,null,2));
    res.end({});
}
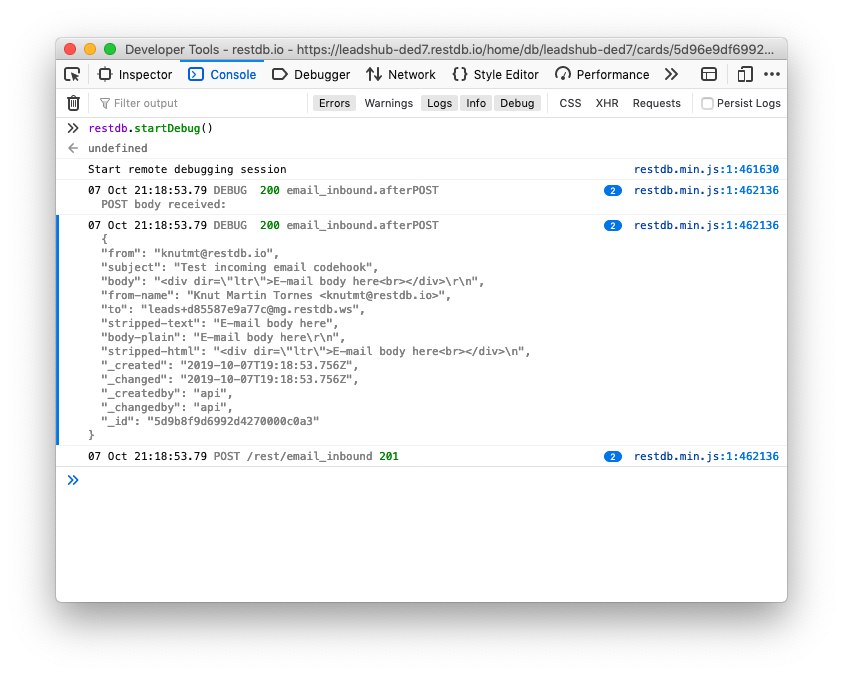
As we can see from the screen shot of the console, we receive a JSON object with the following fields:
- from
- subject
- body
- from-name
- to
- stripped-text
- body-plain
- stripped-html
body contains the full html of the e-mail and body-plain contains only the text. For our codehook, we'll use the subject, body-plain and the from field.
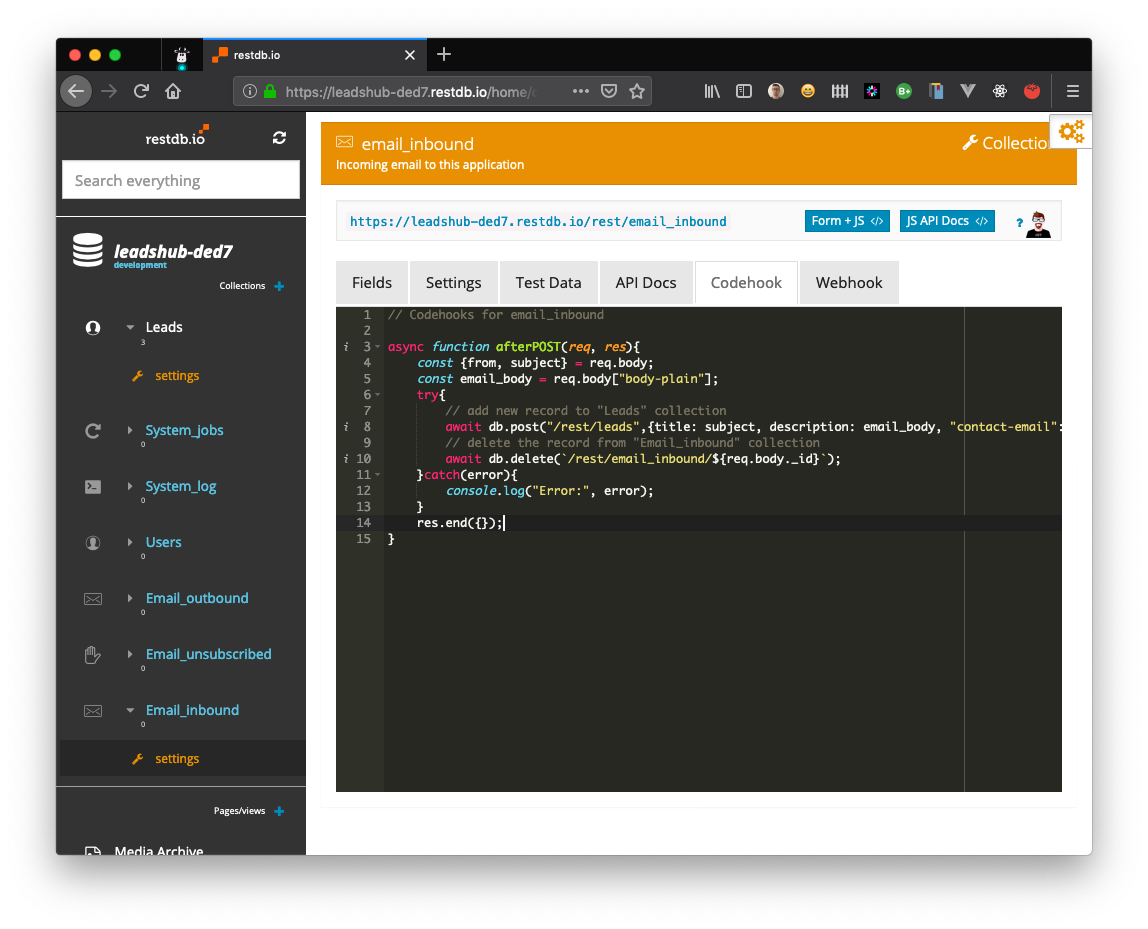
We will now replace our "debug version" of the codehook with the following snippet:
async function afterPOST(req, res){
    const {from, subject} = req.body;
    const email_body = req.body["body-plain"];
    try{
        // add new record to "Leads" collection
        await db.post("/rest/leads",{title: subject, description: email_body, "contact-email": from});
        // delete the record from "Email_inbound" collection
        await db.delete(`/rest/email_inbound/${req.body._id}`);
    }catch(error){
        console.log("Error:", error);
    }
    res.end({});
}
The codehook extracts the fields we need and then POSTs a new record in the leads collection. The system record in the email_inbound collection is then deleted.
Conclusion
restdb.io provides powerful cloud-based mechanisms for automation in a data-centric and serverless way. The built-in REST codehooks and background jobs powered by Javascript has now been extended with incoming e-mail. Based on the code snippets in this article, you should be able to try this out right away.
