All you have to do is to instantiate a new database from our template and add a simple script to each server you want to monitor. The scripts will report the current server load to your database, and you will get a nice dashboard with graphs showing each servers load profile, in real time. The template is easy to extend and adapt.
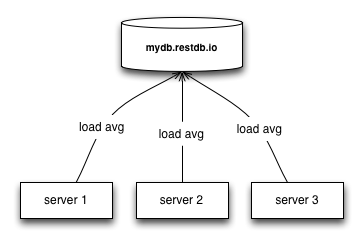
The illustration below shows how 3 servers reports its load average to your restdb.io cloud database (using the REST API):
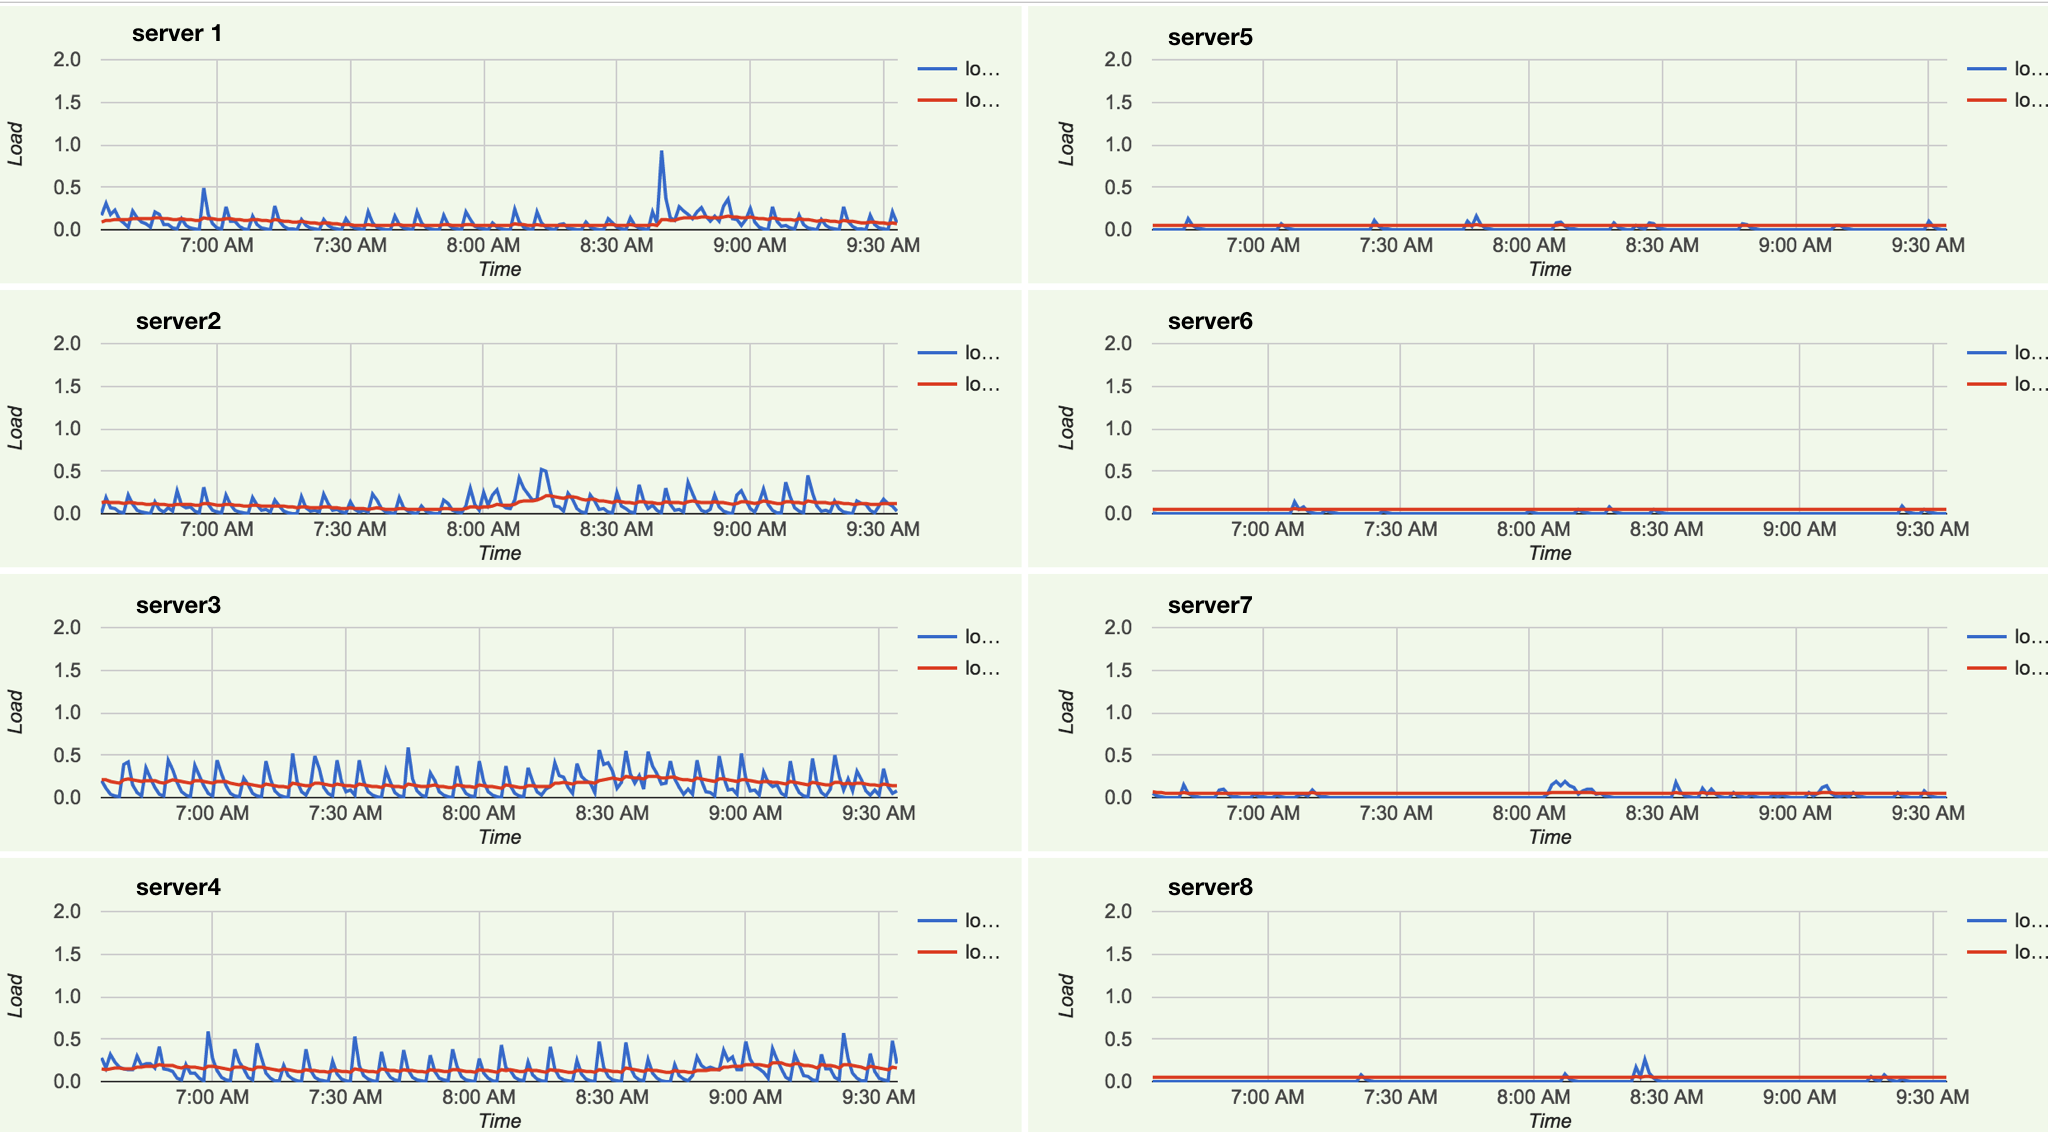
When you have finished this setup guide you will see a dashboard with one chart for each of your servers.
Example dashboard for an 8 server set up showing load averages for the last 3 hours:
Set it up
To set up a database for monitoring your servers, follow these steps:
- Clone this database image
- Set up the API keys
- Install server scripts
- Configure crontab
1. Clone the database image
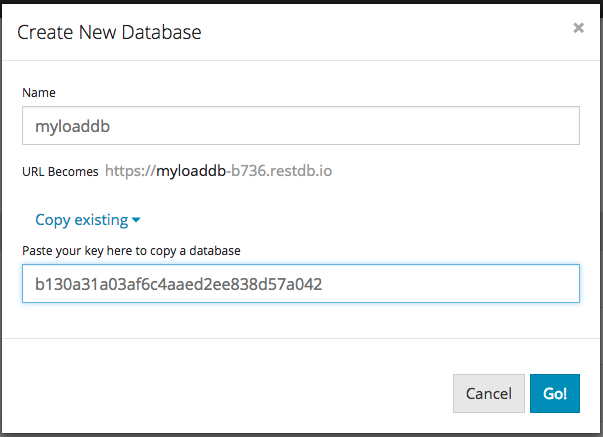
Use this key to create a new database from our template snapshot:
b130a31a03af6c4aaed2ee838d57a042For example, you can call your database myloaddb:
This creates a new database from our template complete with web pages and scripts for monitoring.
When your database has been created, navigate to it by clicking on its icon and start the rest of the set up below.
2. Set up API keys
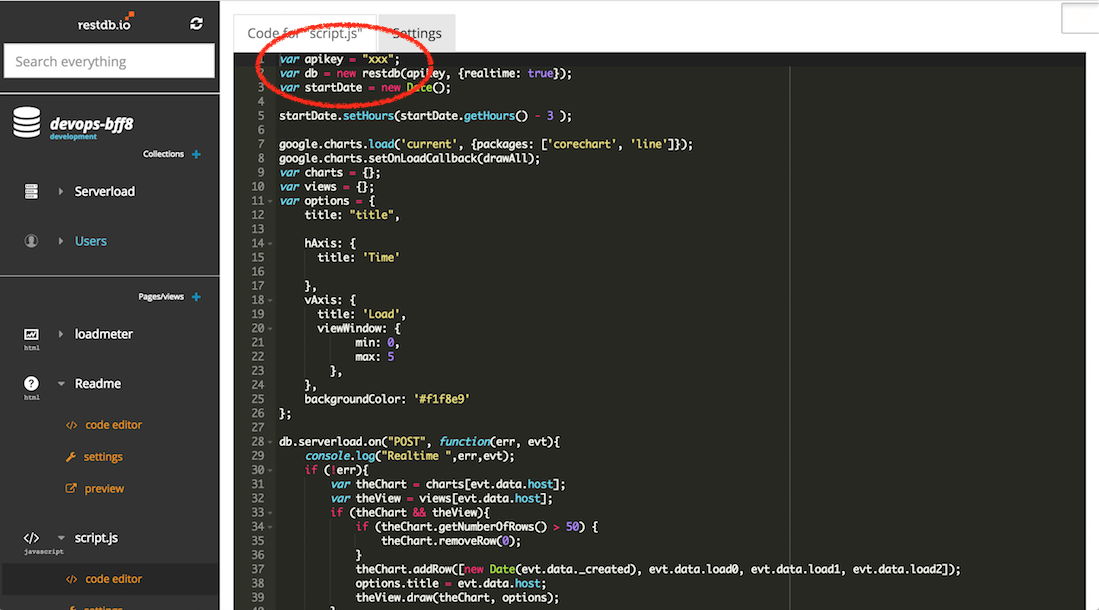
Use the full access key or a create a new web enabled CORS key for API access from the scripts. Edit the JavaScript script.js Page (activate developer mode in the top right corner).
Then insert the CORS api-key on the following code line:
var apikey = "<insert your api-key>";
That's all the work you have to do in restdb.io. If you click on the left menu item called loadmeter, you will see a sample Page with an image. This is where our live charts will be shown.
For that magic to happen, the next steps needs to be completed.
The first step is to install a bash script on each server you want to monitor.
3. Install server scripts
First create a script on each server.
cd /somedir
touch loadscript.sh
chmod +x loadscript.sh
Server load stats
We'll be using the /proc/loadavg filesystem output and parse the string for the load values.
Make sure that you can run the cat /proc/loadavg command on your server, and that the output is similar to the example below:
user:~# cat /proc/loadavg
0.40 0.23 0.16 3/94 16179
On most *nix variants the following command works for getting the load averages:
cat /proc/loadavg | awk '{print $1}'
This script is tested on Linux Ubuntu servers.
You may have to tweak it for small variations on your system, or even replace it with any other method, e.g. uptime, vmstat etc.
Then open the script in your favorite editor, e.g.
user:~# nano /somedir/loadscript.sh
Add the following code into the script:
#!/bin/bash
server=`hostname`
apikey=<your api-key>
load0=`cat /proc/loadavg | awk '{print $1}'`
load1=`cat /proc/loadavg | awk '{print $2}'`
load2=`cat /proc/loadavg | awk '{print $3}'`
json="{\"host\": \"$server\", \"load0\": $load0, \"load1\": $load1, \"load2\": $load2}"
curl -k -H "Content-Type: application/json" -H "x-apikey: $apikey" -X POST -d "$json" 'https://<your db name>.restdb.io/rest/serverload'
Replace <your api-key> with your api-key.
Replace <your db name> with your actual database name, e.g. myloaddb-f20b.
4. Configure crontab
Then edit the crontab file (as root user):
user:~# crontab -e
Add this line to send load to your database once each minute, or any other crontab value you prefer:
* * * * * bash /somedir/loadscript.sh >/tmp/stdout.log 2>/tmp/stderr.log
Replace /somedir with the path to where you saved your script.
Conclusion
We've now shown you how you can quickly roll your own monitoring solution using a restdb.io database, some Javascript code and Bash scripts. It's quick and easy to set up and most importantly, it is very easy to adapt and extend to your particular use case. Perhaps you want to add more parameters to monitor from you servers?
Now it's time to set it up and dig into the code and make it your own. If you create something absolutely magical, perhaps you can create a new improved snapshot that we can share with other DevOpses?
You can read more about how to create restdb.io databases in our documentation section. There is also some gems hidden in our blog. And last but not least, sign up for a free restdb.io account and get going.


 There are plenty of excellent tools to monitor servers in real-time (New Relic, LogicMonitor). These products have tons of features and often costs more than you are (eagerly) willing to pay. Maybe you just need something simple or something custom that you want to keep an eye on in a dashboard. Perhaps the Dev in you is bigger than the Ops? In any of those cases, this article is for you.


